



Webflow adds a built-in plain-text product description to every Ecommerce product. Use it for quick copy, but create custom fields and a dedicated meta-description field for proper SEO and richer layout. Edit it directly in the Ecommerce panel for one-off changes, switch to CSV for bulk updates, or call the API when you’re managing hundreds of listings on a schedule.
TL;DR:
- Using a dedicated meta-description field improves SEO clarity and avoids the default product description appearing in search snippets.
- Splitting product descriptions into multiple custom fields, including rich-text formats, offers better control over layout and formatting.
- Manual updates are feasible for small catalogs, but CSV imports or API integrations become necessary for larger inventories exceeding a few hundred products.
- Keep meta descriptions concise within 150–160 characters, prioritizing key information at the beginning to avoid truncation in mobile search results.
- Automating description updates with AI tools like MerchUp AI facilitates consistent, scalable content generation, especially for large catalogs with ongoing updates.
Webflow ecommerce description fields: default schema and editable settings
Turn on Ecommerce and Webflow generates a Products Collection automatically, complete with a required plain-text field called “Description.” That field is baked into the schema. You can leave it blank, but you cannot delete it once ecommerce is switched on, according to the Ecommerce Collections overview.
In the Designer, that Description field usually sits inside a paragraph element on the product template, and it doubles as the source for Open Graph tags if you haven’t set anything separately. That overlap trips people up constantly. Your on-page sales copy and your social preview text end up being the same string unless you intervene.
A few things worth knowing before you start editing:
- The default field structure (SKU, price, description, images) is fixed and cannot be renamed or removed.
- Custom fields (rich text, plain text, number, reference) can be added freely to the Products Collection.
- Editing the default Description doesn’t touch your meta description unless you’ve bound them separately.
If your descriptions need more than a paragraph, that default field is the wrong tool. Add custom fields instead.
Formatting on-page content: use rich-text and multiple custom fields
Splitting a product description into separate Collection fields gives you far more control than cramming everything into one plain-text box. Rich-text fields support headings, bullet lists, bold and italic emphasis, and line breaks that plain-text fields simply strip out, as Webflow’s own documentation on the rich-text Collection field explains.
A practical setup for most stores:
- Hero copy — a short rich-text field for the main pitch, bound near the top of the product template.
- Features and specs — a second rich-text field, often styled as a bulleted list, placed below the fold.
- Care and shipping — plain text or rich text, depending on whether you need formatting, tucked into a tab or accordion.
Bind each field to its own element on the template so you can style hero copy differently from spec tables without fighting one shared style.
Pro Tip: When you import specs via CSV, paste plain text with line breaks first and confirm it renders as separate paragraphs before switching that column to a rich-text field type. Rich-text CSV imports are far less forgiving of stray formatting than plain text.
SEO meta descriptions: why they’re separate and how to set them in Webflow
Your visible product description and your meta description do two completely different jobs. One persuades a shopper who’s already on the page. The other persuades someone scanning ten blue links to click yours instead. Treat them as one field and you’ll end up with copy that’s either too promotional for search snippets or too dry for the page itself.
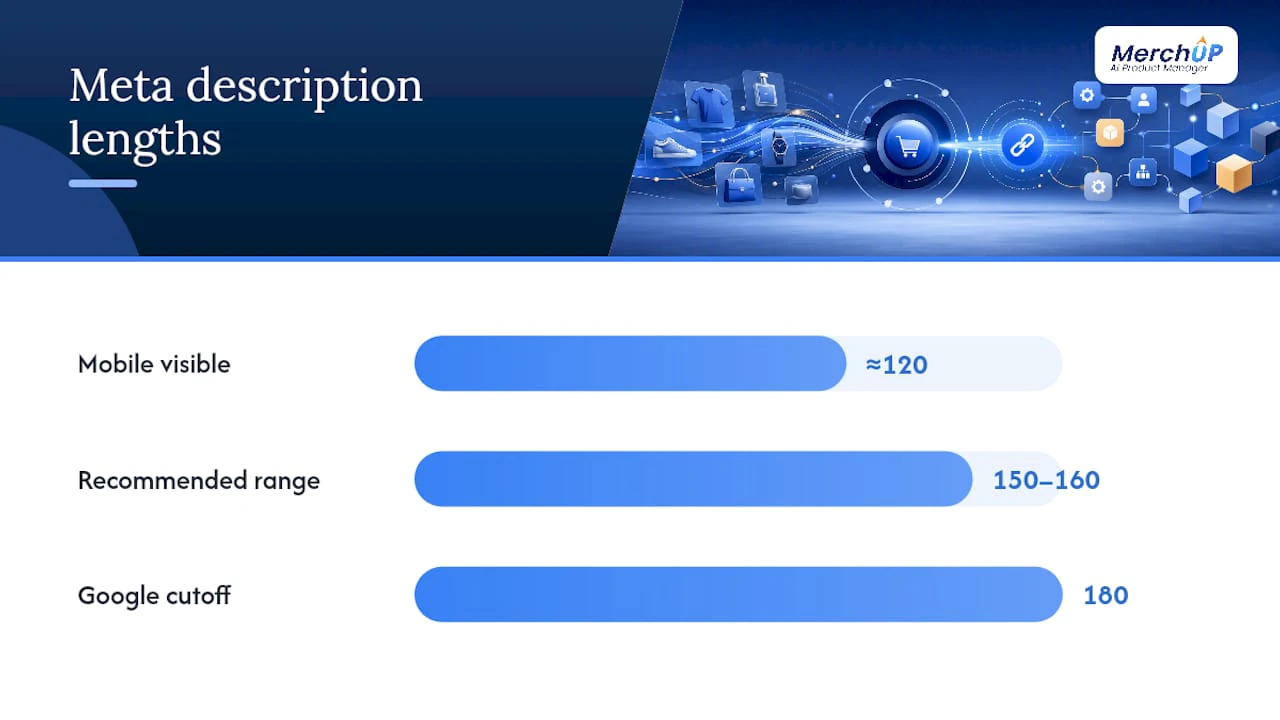
Webflow recommends keeping meta descriptions between 150 and 160 characters, with the most important information front-loaded into the first 120 characters, since that’s roughly what mobile search results display before truncating, according to Webflow’s own SEO guidance. Google typically cuts off anything longer, so a clever closing line at character 180 never gets seen.
To set this up for a Collection Template page:
- Open the product template’s Page Settings and locate the meta description field.
- Connect it to a dedicated Collection field rather than reusing the default Description.
- Use Webflow AI to draft a first pass, then edit it for brand voice and accuracy.
- Check the character count indicator Webflow displays as you type.
Webflow University’s guidance on title tags and meta descriptions makes a point worth remembering: clear, unique metadata doesn’t just help human searchers decide whether to click. It also helps AI search tools understand and cite your product pages accurately, which matters more each year as answer engines pull snippets directly into their responses.
Workflows for updates: manual edits, CSV imports and the Webflow API
How you update descriptions depends entirely on catalog size. A boutique store with forty products can live comfortably in the Ecommerce panel. A catalog with four thousand SKUs cannot.
- Manual editing — open a product in the Ecommerce panel, update the field, and either save as a draft or publish immediately. Drafts let you stage changes without them going live, which is worth using even for small batches.
- CSV bulk import — map your spreadsheet columns to Collection fields, run a test import on a small batch of five to ten products first, and check that rich-text formatting survived the round trip before committing to the full file.
- Webflow API — for programmatic updates, developers can use product endpoints alongside the
page.setDescriptionmethod documented in Webflow’s Designer reference, which sets a page’s description directly from a script.
Choose CSV for a one-off cleanup project. Choose the API when descriptions need to sync automatically from another system, such as a supplier feed or an external content tool, according to Webflow’s guidance on managing products and categories.
Copy frameworks and quick templates for Webflow product descriptions
A description that converts usually follows the same skeleton: one benefit-led opening line, two or three supporting points that answer “why should I care”, a short block of technical specifics, and a closing line that nudges towards purchase. That structure maps neatly onto the multi-field setup covered earlier, so your writing process and your Webflow architecture reinforce each other instead of fighting.
Three quick starting templates:
- Hero-first: “Cuts prep time in half.” Then two lines on how, one spec bullet, one CTA. Good for gadgets and tools where the benefit sells itself.
- Features-first: Open with a short list of three specs, then a single sentence tying them to a real use case. Works well for technical products where buyers compare numbers before they care about feeling.
- Spec-first: Lead with dimensions, materials or compatibility, and push the persuasive language into a secondary paragraph. Fits industrial and B2B catalogs where the spec sheet is the pitch.
Writing for a single imagined customer, rather than a generic “shoppers”, tends to produce sharper, more specific copy than trying to please everyone at once.
Pro Tip: Write your meta description last, not first. Draft the full on-page copy, then compress its strongest line into 150 to 160 characters rather than writing a separate pitch from scratch.
For structural approaches to laying this out across a whole catalog, MerchUp AI’s guide on product description structure covers how to map these blocks into CMS fields consistently.
MerchUp’s role: how the publisher’s tool maps to Webflow description workflows
Manually rewriting descriptions across a catalog of any real size eats time fast, which is precisely the gap MerchUp AI was built to close. The platform uses AI to generate SEO-optimised product descriptions from customisable templates, edited through a visual editor rather than raw HTML.
For stores managing volume, the relevant pieces are:
- AI-generated copy built from templates, so tone stays consistent across hundreds of listings.
- A visual editor for reviewing and adjusting AI output before it goes live.
- Bulk editing and publishing tools designed for catalog-wide updates rather than one product at a time.
- Live integration with Shopify today, with Webflow support planned as an upcoming addition rather than a current feature.
That last point matters. If your catalog lives on Webflow right now, the manual, CSV, and API workflows above remain your path. MerchUp AI’s role today is strongest for Shopify sellers who want the same scaling logic before Webflow support arrives. For deeper SEO context on why structured descriptions matter beyond conversion, see product description SEO.
What actually gets fixed in the first 90 minutes
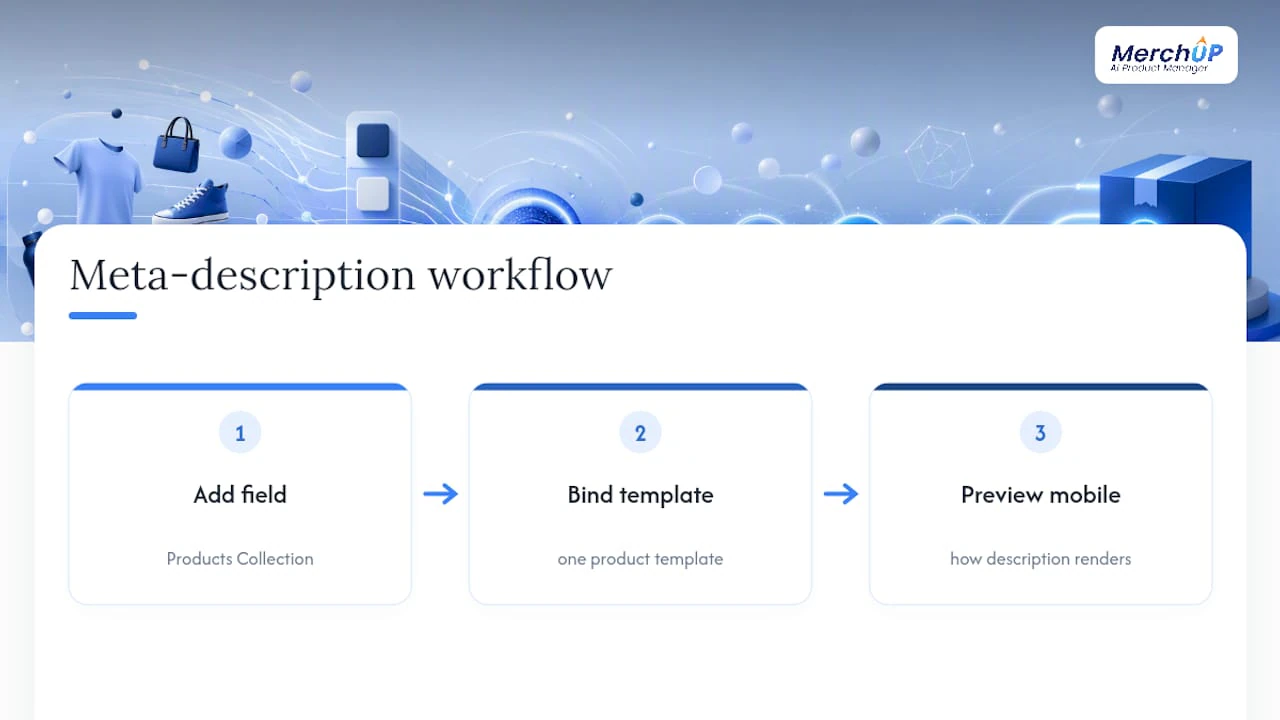
Most stores waste weeks debating description strategy when the first useful moves take under two hours. In the first 30 minutes: add a dedicated meta-description field to your Products Collection, bind it in one product template, and preview how it renders on mobile.
The next 90 minutes are where the real improvement happens. Split your default Description into separate rich-text fields for features and specs, prepare a small CSV batch, and test a staged publish before touching your live catalog.
Escalate to an automated pipeline once you’re maintaining more than a few hundred SKUs, or once a single product launch means touching dozens of listings at once, using Webflow SEO Automation to streamline your processes. Below that threshold, manual and CSV workflows are still faster than building automation you’ll only use occasionally.
— Jamie Moss
Scale your Webflow descriptions without the manual grind
There are other routes here. You can keep editing fields by hand in the Ecommerce panel, or build your own CSV and API pipeline from scratch using the workflows above. Both work. Neither scales gracefully once your catalog passes a few hundred products and every listing needs a meta description, a features block, and a spec section written to a consistent standard.

This platform generates SEO-optimised product copy from customisable templates, lets you review everything in a visual editor before publishing, and supports bulk publishing to streamline catalog-wide updates. It integrates live with ecommerce platforms today, with plans to support others in the future. If your catalog currently lives elsewhere and you want a preview of what AI-assisted description writing actually looks like in practice, the MerchUp tutorial walks through the full workflow in under a minute, and the MerchUp product page covers templates, pricing tiers, and current integrations in full.
Where to check the official Webflow documentation
Everything above traces back to Webflow’s own reference material, and it’s worth bookmarking directly rather than relying on secondhand summaries:
- Ecommerce Collections overview — default Products Collection schema and field behaviour.
- Add SEO title and meta description — character guidance and Webflow AI generation.
- Rich-text Collection field — formatting options for multi-part descriptions.
- Designer reference: set page description — the API method for programmatic updates.
- Add and manage products and categories — CSV import and publishing behaviour.
Webflow University’s SEO video guidance is worth a watch if you’d rather see the meta-description setup demonstrated than read it in text.
Sources
- Ecommerce Collections overview – Webflow Help Center
- Designer reference — set page description — Webflow Developers
- Rich-text Collection field – Webflow Help Center


Comments
No comments yet — be the first to share what you think.