


The Shopify product description editor lives at Admin > Products > All products > select a product > Description field. For a single edit, you are there in under ten seconds. For dozens or hundreds of products, you have three realistic options: the native bulk editor (fast, limited), a CSV export/import workflow (thorough, slower), or a spreadsheet-style app like Mixtable or a dedicated AI tool like Merchup AI (fastest at scale, with the least manual effort).
Here is the honest trade-off picture before you pick a method:
- Single product edit: Rich text editor or HTML toggle, save, preview. Done in minutes. Full control, zero risk.
- Native bulk editor: Good for quick text changes across dozens of products. No HTML editing, no rollback if something goes wrong.
- CSV export/import: Best for structured, programmatic changes. Requires care with the
descriptionHtmlfield — broken HTML breaks product pages. - Spreadsheet apps (Mixtable) or AI tools (Merchup AI): Right for large catalogues, teams, or when you need generation and editing in one flow.
Open Products in your Shopify Admin right now and you can make your first edit in the next 60 seconds. The rest of this guide covers every method in detail.
How to use the Shopify product description editor for a single product
- Log in to your Shopify Admin and click Products in the left sidebar.
- Click All products, then select the product you want to edit.
- Scroll to the Description field. The rich text editor loads by default — it supports bold, italic, headings (H2–H4), ordered and unordered lists, hyperlinks, and the ability to insert images, audio, and video.
- Edit your text directly. Use the toolbar to apply formatting.
- Click the <> icon in the toolbar to toggle into raw HTML view. This is where you paste custom markup, add tables, or apply CSS classes your theme supports.
- Click Save in the top-right corner.
- Click View (or open the product URL in a new tab) to preview the live page. To check mobile rendering, open your theme customiser and use the mobile preview toggle, or simply resize your browser window.
One thing that trips up new merchants: if your description looks correct in the editor but does not appear on the storefront, the issue is almost always a theme layout setting, not a content problem. Moving the description block — for example, placing it beneath the Add to Cart button or inside a tab — is a theme change managed in the Theme Editor under the Main product section, not here. The Shopify Community thread on missing description fields confirms this is one of the most common points of confusion.
Pro Tip: Use the HTML view for anything structural: tables, custom div wrappers, or responsive image markup. The rich text editor occasionally adds unwanted <p> tags around block elements when you switch back and forth, so if you are pasting a custom HTML block, paste it in HTML view and stay there until you save.
Three fast ways to bulk edit product descriptions
Choosing the wrong bulk method costs time. Here is when each one earns its place.
Method 1: Shopify’s native bulk editor
Go to Products > All products, tick the checkboxes next to the products you want to edit, then click Edit products. The bulk editor opens a spreadsheet-style grid. You can edit titles, prices, and inventory — but the description field in the native bulk editor shows plain text only. It does not render HTML, so it is only safe for simple text replacements where you are not relying on formatting.
Best for: changing a short phrase across a handful of products, or updating a spec that appears identically in many descriptions.
Method 2: CSV export and import (Excelify-style workflow)
Shopify lets you export your full product catalogue as a CSV from Products > Export. The description column in that file is the Body (HTML) field, which maps directly to the descriptionHtml field used by the Admin API. You can open the file in Excel or Google Sheets, edit descriptions in bulk using find-and-replace or formulas, then re-import via Products > Import.
Apps like Excelify extend this with a cleaner interface, scheduled imports, and better error reporting — particularly useful for large catalogues where a raw Shopify CSV import might time out or silently skip rows. For detailed advice on repurposing product descriptions and embedded videos efficiently, see the video marketing repurposing workflow guide.
Key CSV column notes:
Handle— unique product identifier; never change this.ID— Shopify’s internal product ID; leave it untouched.Body (HTML)— your description; valid HTML only.
Always export a full backup CSV before any mass import. Test your changes on 5–10 products first, verify the live pages, then run the full import.
Method 3: Spreadsheet apps and dedicated bulk-edit tools
Mixtable maps your product descriptions to spreadsheet rows and provides a WYSIWYG rich text editor in a sidebar panel. You edit formatted output directly — no toggling raw HTML for each row. For large catalogues, this reduces errors significantly because editors see exactly what the description will look like before saving.
Dedicated AI tools like Merchup AI go further: generate drafts, edit in a visual editor, and bulk-publish directly to Shopify in one workflow.
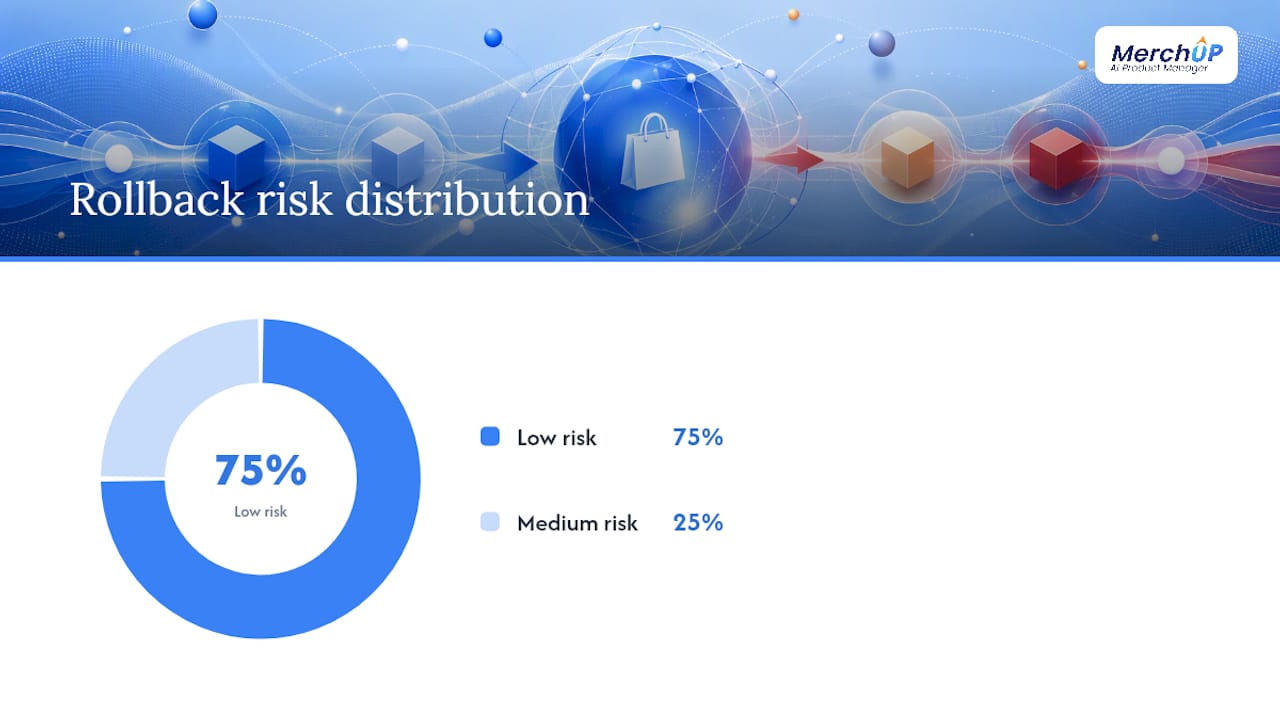
| Method | Speed | Complexity | Rollback risk | Best for |
|---|---|---|---|---|
| Native bulk editor | Fast | Low | Medium (no undo) | Quick text changes, small batches |
| CSV export/import | Moderate | Medium | Low (keep backup) | Structured edits, mass find-and-replace |
| Spreadsheet app (e.g. Mixtable) | Fast | Low–Medium | Low (app history) | HTML editing without coding, hundreds of items |
| Dedicated AI/SaaS tool | Fastest at scale | Low | Low (revision history) | Large catalogues, generation + edit + publish |
Editing HTML and embedding images inside descriptions
Shopify stores every product description as HTML. The rich text editor is a WYSIWYG layer on top of that HTML, but the underlying field — descriptionHtml — is what the API reads and what bulk imports write to. This matters because invalid HTML in that field can silently break your product page layout.

Images inside the description vs. the product media gallery
These are two separate things. The Media section on the product page manages your main product images: the gallery, zoom, and variant images your theme renders in the product image carousel. The Insert image button inside the description editor embeds an <img> tag directly into the description HTML. That embedded image appears wherever the description block renders in your theme — which may or may not be where you want it.
A few practical points:
- Embedded description images are not managed by Shopify’s CDN image optimisation in the same way as media gallery images, so keep file sizes small (under 200 KB where possible).
- The Insert image button uploads the image to your Shopify files and inserts a hosted URL — you are not hotlinking an external image.
- For responsive images, use the HTML view and add
style="max-width:100%;height:auto;"to your<img>tag. This prevents images from overflowing on narrow mobile screens.
A minimal, safe HTML table you can paste into the <> view:
<table>
  <thead>
    <tr><th>Spec</th><th>Value</th></tr>
  </thead>
  <tbody>
    <tr><td>Material</td><td>100% organic cotton</td></tr>
    <tr><td>Weight</td><td>320 gsm</td></tr>
  </tbody>
</table>
Pro Tip: Always check mobile rendering after embedding a table or image. A two-column table that looks clean on desktop often collapses into an unreadable stack on a 375px screen. If your theme does not apply responsive table styles by default, wrap the table in <div style="overflow-x:auto;"> to add horizontal scroll on small screens.
How to use AI for product descriptions: Shopify Magic and third-party tools
AI belongs at the start of your description workflow, not the end. Treating AI output as a finished draft and publishing it directly is the single fastest way to fill your store with generic, unconverting copy.

Shopify Magic appears as a button inside the product description field — look for the stars icon or “Generate text” prompt when the Description field is active. It generates a draft from your product title and any keywords you supply. The output is grammatically clean and structurally reasonable, but it tends toward vague benefit language (“perfect for everyday use”) and misses product-specific details like compatibility notes, sizing, or material grades.
Third-party AI tools — including Merchup AI and the Copy.ai alternatives worth evaluating — let you generate drafts at scale using customisable templates, then push them directly to Shopify. The credit-based generation model means you can run a full catalogue refresh without paying per-word rates.
Before and after: AI draft vs. merchant-edited version
AI draft (Shopify Magic output): “Introducing our premium stainless steel water bottle. Designed for everyday use, this stylish bottle keeps your drinks cold for hours. Perfect for gym, travel, and outdoor adventures. Stay hydrated in style.”
Merchant-edited version: Keeps drinks cold for 24 hours and hot for 12, tested at temperatures from -10°C to 60°C. The 750ml capacity fits standard car cup holders. The leak-proof lid uses a single-hand push-button mechanism — no unscrewing mid-run. Available in matte black, slate grey, and forest green.
The difference is specificity. The AI draft is not wrong — it is just not useful to a buyer deciding between three similar bottles.
Quality control checklist before publishing any AI draft:
- Replace vague phrases (“perfect for”, “designed for”) with measurable claims or specific use cases.
- Add SKU-level details: dimensions, weight, compatibility, materials, certifications.
- Check that size or variant-specific information is accurate for each product variant.
- Read it aloud in your brand voice — does it sound like you, or like a press release?
- Run a quick duplicate content check if you have generated similar descriptions for related products.
For a deeper look at turning AI drafts into copy that converts, the AI product descriptions guide covers templates and editing frameworks in detail.
Merchup AI: when to move to an integrated editor for scale
Manual editing and CSV imports work well up to a point. Once your catalogue runs into hundreds of products, or you have a team of editors working simultaneously, the friction compounds fast: version conflicts, broken HTML from raw CSV edits, no audit trail, and no way to generate and publish in one flow.
Merchup AI is built for exactly that inflection point. The platform combines AI description generation, a visual drag-and-drop editor, bulk publishing directly to Shopify, customisable templates, SEO optimisation, and activity tracking in a single interface. You connect your Shopify store, import your product catalogue, choose a template, generate drafts, review them, and publish in bulk — without touching a CSV or toggling HTML.
When Merchup AI is the right call:
- Your catalogue has more than a few hundred products and descriptions need regular refreshing (seasonal updates, new launches, localisation runs).
- Multiple team members edit descriptions and you need an audit trail to see who changed what.
- You want generation and editing in one place rather than generating in one tool, pasting into Shopify, and formatting manually.
- You are running credit-based generation at scale and need template consistency across product families.
When CSV or spreadsheet apps still make sense:
- You need highly custom programmatic updates (for example, injecting dynamic data from an external PIM system).
- You are making a one-off structural change to a small batch and do not need ongoing generation.
Integration quick steps:
- Sign up at Merchup AI.
- Connect your Shopify store via the Shopify integration.
- Import your product catalogue.
- Select or customise a description template.
- Generate drafts using the AI engine.
- Review and edit in the visual editor.
- Bulk publish to Shopify.
Pro Tip: Use Merchup AI’s activity tracking to build a changelog habit. Before any seasonal refresh, export a record of your current descriptions, run the new generation, review the diff, and publish. You get the speed of AI generation with the safety net of a documented rollback point.
How to edit your product’s SEO title and meta description
The SEO fields live at the bottom of the product page in Shopify Admin, under Search engine listing preview. Click Edit website SEO to expand the section and reveal two editable fields: the page title and the meta description.
Step-by-step:
- Open the product in Admin.
- Scroll to the bottom of the page to find Search engine listing preview.
- Click Edit website SEO.
- Edit the Page title field. Shopify pre-fills this from your product title, but you can override it.
- Edit the Meta description field. This does not affect rankings directly, but a well-written meta description improves click-through rates from search results.
- Click Save.
Per the Shopify Help Centre guidance on product pages, keep these fields concise to avoid truncation in search results.
Practical character guidance:
- Page title: aim for 50–60 characters. Google typically truncates beyond 60.
- Meta description: aim for 140–155 characters. Anything longer gets cut in most search result layouts.
SEO field checklist:
- Include your primary keyword naturally in the page title, near the front.
- Write the meta description as a benefit statement, not a keyword list.
- Add a soft call to action in the meta description where it fits (“Free shipping on orders over £50”).
- Never copy the manufacturer’s description into the meta description — Shopify’s own guidance flags duplicate content as a risk to organic visibility.
- Make every product’s SEO title and meta description unique. Two products with identical meta descriptions compete against each other in search.
For a full SEO workflow beyond the product editor, the product description SEO guide covers keyword placement, structured data, and internal linking in detail.
Copywriting and formatting best practices for Shopify descriptions
The job of a product description is to give a buyer enough confidence to click Add to Cart. High-converting descriptions favour a benefit-led opening, 3–5 scannable bullets for specs, and a short use-case sentence — not dense manufacturer copy pasted in wholesale.
The core rules:
- Open with the single most compelling benefit, not the product name or category.
- Use 3–5 bullet points for specifications, dimensions, and compatibility details.
- Keep paragraphs to 2–3 sentences maximum. On mobile, a six-line paragraph is a wall of text.
- Use H2 or H3 headings inside longer descriptions only when the product genuinely has distinct sections (e.g. “What’s in the box” and “Technical specifications”).
- Embed images or tables only when they add information the text cannot convey efficiently.
Three ready templates:
Benefit hook + bullets + use case (general products): [One sentence: the primary benefit or outcome]. [One sentence: secondary benefit or differentiator].
- Spec 1
- Spec 2
- Spec 3 [One sentence: the ideal use case or customer scenario.]
Spec-first template (technical products): [One sentence: what the product does and for whom]. | Spec | Value | [One sentence: compatibility or system requirements.]
Lifestyle template (premium or gift items): [One evocative sentence: the experience or feeling]. [One sentence: the quality or craft detail that justifies the price].
- Key feature 1
- Key feature 2 [One sentence: gifting or occasion context.]
Before and after:
Before (manufacturer copy): “Model XR-400 cordless drill. 18V lithium-ion battery. Variable speed trigger. LED work light. Includes 2 batteries and charger.”
After (merchant-edited): Drives screws and drills through timber, masonry, and steel without the cable getting in the way. The 18V battery holds charge across a full day of intermittent use — no mid-job recharging.
- 60Nm torque, 2-speed gearbox (0–450 / 0–1,500 RPM)
- Built-in LED illuminates the bit in low-light spaces
- Includes two 2Ah batteries and a 60-minute fast charger
Ready for the weekend job or the building site. For copy-and-paste description templates across product categories, the Merchup AI template library covers over 20 formats.
| Format element | Use when | Avoid when |
|---|---|---|
| H2/H3 headings | Long descriptions with multiple distinct sections | Short descriptions with concise text |
| Bullet list | Listing 3+ specs or features | Describing a single benefit |
| Embedded image | Visual comparison or assembly diagram adds clarity | Image duplicates the media gallery |
| HTML table | Comparing variants or listing technical specs | Simple prose descriptions |
Previewing edits, testing on mobile, and backing up before bulk changes
- After saving a single product edit, click View on the product page to open the live storefront URL. Check the description renders correctly in your theme.
- Open your browser’s developer tools (F12 in Chrome) and toggle the mobile view, or use Shopify’s theme customiser mobile preview to see how the description wraps on a 375px screen.
- Before any bulk edit, go to Products > Export and download a full products CSV. Save it locally with a date-stamped filename (e.g.
products-backup-2026-03-15.csv). This is your rollback file. - If you edited raw HTML in the CSV, open 3–5 of the edited product pages immediately after import and verify the formatting. A missing closing tag in one row can corrupt the description display.
- For rollback: re-import your backup CSV via Products > Import, selecting “Overwrite existing products”. Shopify will restore the previous description values from the file.
Apps that maintain revision history — including Mixtable and Merchup AI — give you a faster rollback path for description-level changes without needing to manage CSV files manually.
Pro Tip: Before a large seasonal refresh, test your new description template on five products across different product types. Check them on desktop, mobile, and in the Shopify mobile app preview. Only then run the full batch. Catching a formatting issue on five products takes minutes; catching it after 500 imports takes hours.
The mistake that costs merchants the most
The most expensive error in product description management is not a technical one. It is publishing AI-generated or bulk-imported descriptions without a human review step, then discovering three months later that half your catalogue contains vague copy that says nothing a competitor’s listing does not also say.
The second most expensive is skipping the CSV backup before a mass import. Every merchant who has done a bulk overwrite without a backup has a story about it. The recovery options without a backup are limited: manual re-entry, a third-party app with its own revision history, or a Shopify support ticket that may or may not retrieve a previous state.
A review workflow does not need to be elaborate. A simple rule — no description goes live without one human reading it against the actual product — catches the majority of AI errors: wrong dimensions, misattributed features, copy pasted from a similar product. Build that step into your process before you scale, not after.
Merchup AI cuts the cycle time from draft to live description
Generating, editing, and publishing product descriptions manually across a growing Shopify catalogue is the kind of work that expands to fill whatever time you give it. Merchup AI compresses that cycle: connect your store, generate drafts from your product data using customisable templates, edit in a visual interface, and bulk-publish directly to Shopify without touching a CSV or writing a line of HTML.
The features that matter most for the workflows covered in this guide: AI generation with credit-based scaling, a drag-and-drop visual editor, bulk publishing, SEO optimisation built into the generation step, and activity tracking so your team has an audit trail. Upcoming integrations include WooCommerce, Wix, Webflow, and eBay — so the workflow you build now transfers as your channel mix grows.
Start a trial or review pricing at Merchup AI to see which plan fits your catalogue size.
Sources
Official Shopify documentation and practical guides used to build this article:
- Using the rich text editor for content | Shopify Help Center
- ProductInput object | Shopify developer docs
- Edit Shopify product description with rich-text editor | Mixtable help centre
- How to write great product descriptions in Shopify | Gochyu blog


Comments
No comments yet — be the first to share what you think.