


Format Shopify product descriptions in the admin under Products → select product → Description. The rich text editor handles the vast majority of needs: bold, italic, headings, bullet lists, and links. When you need custom layouts, click the Show HTML (<>) icon to paste targeted snippets. For site-wide styling changes, edit your theme’s CSS files. For stores with many SKUs, bulk tools or AI generation workflows are the practical path.
Three escalation paths, in order of complexity:
- Rich text editor — routine edits, standard formatting, most product pages
- HTML/source view — custom structure, embedded video, simple tables
- Theme CSS or bulk tools — site-wide style fixes, variant-specific content, catalogue-scale publishing
How to open and edit a product description in Shopify admin
The workflow is straightforward, but the details matter if you want consistent results across your catalogue.
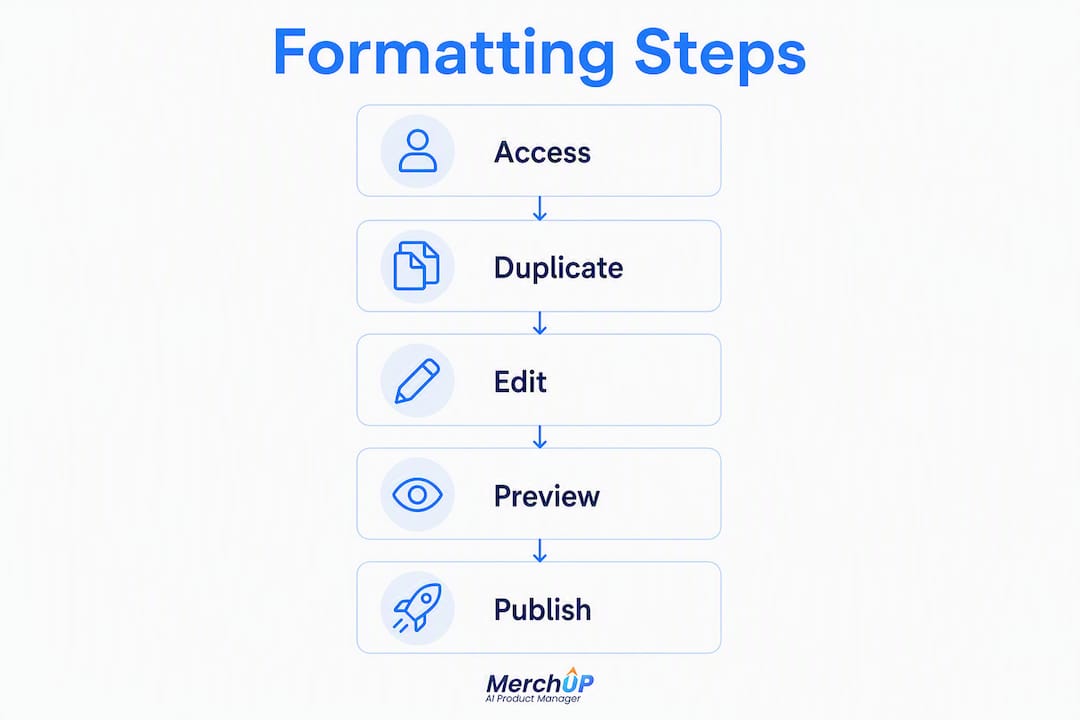
- Log into your Shopify admin and click Products in the left sidebar.
- Select the product you want to edit.
- Scroll to the Description field — it sits below the product title.
- Use the toolbar to apply formatting: bold (
B), italic (I), underline, ordered and unordered lists, headings (H1–H6 in the dropdown), links, blockquotes, tables, and media embeds. - Click Save in the top-right corner.
- Click View (or the eye icon) to preview the live page.
A practical structure that converts well: one short lead sentence stating what the product is, one sentence on who it suits, a bullet list of key benefits or specs, and an optional brand or technical paragraph at the end. Keep headings to H2 or H3 within the description — H1 is already used by the product title in most themes.
Pro Tip: Before publishing any formatting change site-wide, duplicate your active theme (Online Store → Themes → Actions → Duplicate) and preview changes on the duplicate first. This gives you a clean rollback if something breaks.
You can also use ready-made product description templates to speed up the structure and keep copy consistent across your range.
When to use the HTML view and what to put in it
The <> icon in the editor toolbar opens the HTML/source view. This is where you go when the visual toolbar cannot produce the layout you need — a two-column spec table, a custom callout block, or an embedded video.
Shopify’s editor supports custom HTML tags including <h2>, <h3>, <ul>, <ol>, <strong>, <em>, inline links, and simple tables. A safe, minimal example for a spec table:
<h3>Technical specifications</h3>
<table>
  <tr><td><strong>Weight</strong></td><td>1.2 kg</td></tr>
  <tr><td><strong>Dimensions</strong></td><td>30 × 20 × 10 cm</td></tr>
  <tr><td><strong>Material</strong></td><td>Brushed aluminium</td></tr>
</table>
A few things to watch:
- Shopify escapes certain HTML characters for security, so pasting a full webpage — including
<html>,<head>, or<body>tags — will show raw code on the storefront rather than rendered content. Paste only the content fragment you need. - Never include
<script>tags or external JavaScript in the description field. Shopify strips or escapes these, and they create security risks. - Avoid deeply nested or complex markup. If the description field starts to look like a theme template, it probably belongs in one.
Pro Tip: For interactive components like accordions or tabbed specs, skip the description field entirely. Add them as a theme section or use a vetted app — it is far easier to maintain and will not break when you update your theme.
How to add images and multimedia inside product descriptions
Images inside descriptions serve a different purpose to your main product gallery: they show context, scale, or usage. Getting them in correctly takes two steps.
- Upload first. Go to Content → Files in your Shopify admin and upload the image there, or use the editor’s image-insert control, which uploads and hosts the file automatically. Either way, you end up with a Shopify-hosted URL. Copying an image from Google Docs or Word and pasting it directly will not host it correctly — the image will appear broken for shoppers.
- Set alt text. In the HTML view, add
alt="descriptive text"to every<img>tag. Alt text is read by screen readers and indexed by Google Images, so a phrase likealt="navy wool coat on a wooden hanger"does more work thanalt="image1". - Embedding video. Use the HTML view to paste an
<iframe>embed from YouTube or Vimeo. Keep thewidthandheightattributes, and addstyle="max-width:100%;"so the embed scales on mobile. - Mobile preview is non-negotiable. After inserting any image or embed, use the theme preview on a mobile viewport. Wide images and fixed-width iframes are the most common cause of horizontal scroll on product pages.
Avoid inserting images wider than your theme’s content column — typically 600–800 px for most Shopify themes. Oversized images slow page load and push text off-screen on smaller devices.
How your theme controls description styling and what to do about it
If your descriptions look fine in the editor but odd on the storefront — bullets misaligned, bold text appearing larger than expected, or fonts not matching — the theme’s CSS is almost certainly the cause.
- Open your browser’s DevTools (right-click → Inspect) on the product page and click the description element. Look for CSS rules targeting tags like
strong,ul, orlithat are set globally rather than scoped to the description container. - Most Shopify themes wrap the description in a container with a class like
.product__descriptionor.product-page-description. Scoping your CSS fixes to that class prevents unintended changes elsewhere on the site. - A targeted fix looks like this:
.product__description strong { font-size: inherit; font-weight: 700; }— this stops bold text inheriting an oversized heading size from a globalstrongrule. Community troubleshooting threads confirm this scoped approach resolves the majority of visual inconsistencies without touching the rest of the theme. - Add custom CSS in Online Store → Themes → Edit code → assets/base.css (or
theme.scss.liquidin older themes). Keep changes minimal and commented so you can find and remove them later.
Pro Tip: Always duplicate your theme before editing CSS. Online Store → Themes → Actions → Duplicate takes under a minute and gives you a one-click rollback if the change causes problems.
Formatting best practices for readability, conversion, and SEO
Structure is what separates a description that converts from one that gets skimmed and abandoned. Structured formatting with short paragraphs, bullet points, and headings makes product pages scannable, which matters most for mobile shoppers who rarely read linearly.
A description that works tends to follow this pattern:
- Lead sentence — what the product is, in plain language
- Who it suits — one sentence on the ideal buyer or use case
- Benefit bullets — three to six points, each starting with a verb or a concrete noun
- Technical or brand section — optional, for premium or complex products
On length, the guidance is practical rather than prescriptive:
| Product type | Recommended word count | Priority |
|---|---|---|
| Standard retail (clothing, accessories, homewares) | 100 words | Front-load benefits |
| Premium or technical (electronics, tools, specialist gear) | — | Lead with specs, then story |
For SEO, avoid copying manufacturer descriptions — duplicate content dilutes your authority and gives Google no reason to rank your page over a competitor’s. Write in your own brand voice, include your target phrase naturally once or twice, and use H2–H4 headings to give the page structure that search engines can parse. A full product description SEO guide covers keyword placement and structured data in more depth.
Fixing common formatting problems step by step
Most description formatting issues fall into a handful of categories. Here is how to diagnose and fix each one.
Bullets misaligned or missing on the storefront
- Open DevTools and inspect the
<ul>or<li>elements in the description. - Check whether the theme resets
list-style: noneorpadding: 0globally. If so, add a scoped rule:.product__description ul { list-style: disc; padding-left: 1.5rem; }. - Theme CSS overrides are the most common cause of visual inconsistencies — fix them at the theme level, not by adding inline styles to every description.
Raw HTML showing on the page instead of rendering
- Open the HTML view and check for unescaped characters such as
&,<, or>outside of valid tags. - Remove any
<html>,<head>,<body>, or<script>tags — Shopify’s sanitisation will escape these and display them as text. - Paste only the content fragment (the
<p>,<ul>,<table>block you need), not a full document. - Save and preview in a private browser window to rule out cached content.
Bold text appearing at a different size
- Inspect the
strongselector in DevTools. A global rule may be settingfont-sizeonstrongelements. - Add a scoped override:
.product__description strong { font-size: inherit; }.
Need per-variant content
Metafields are the correct solution for variant-specific product data. Create a metafield definition in Settings → Custom data → Products, populate it per variant, and surface it with a small Liquid snippet in your theme template. Trying to manage variant differences inside a single description field becomes unmanageable quickly.
Scaling consistent descriptions across a large catalogue
For a store with dozens or hundreds of SKUs, manual editing is not a viable long-term strategy. The practical options scale with catalogue size.
- Small store (under 50 SKUs): Use a standard copy template with fixed heading structure and fill in product-specific details manually. Ready-made templates cut the time per product significantly.
- Medium catalogue (50–500 SKUs): Combine metafields for structured data (dimensions, materials, compatibility) with periodic AI-assisted copy refreshes. This keeps descriptions consistent without rewriting everything from scratch.
- Large catalogue (500+ SKUs): An automated generation pipeline with editorial QA is the only realistic path. Generate in batches, review a sample, then bulk-publish.
Merchup AI fits naturally into the medium and large-catalogue workflows. It generates SEO-optimised descriptions at scale, enforces template structure across your catalogue, and publishes directly to Shopify via its native integration. You can run a small batch first, apply an editorial QA pass, and then schedule bulk publication — which keeps human oversight in the loop without slowing the process down. For stores evaluating their options, the best Shopify SEO apps guide covers how AI generation tools compare to manual and template-only approaches.
Unique, brand-specific copy is an SEO asset — schedule periodic reviews so descriptions do not drift back towards manufacturer boilerplate over time.
Pro Tip: Whatever workflow you use, always keep a record of the original description before bulk edits. Shopify’s version history is limited; an external log (a spreadsheet or a CSV export) gives you a clean rollback point.
Why formatting consistency is worth the investment
The stores that convert best are rarely the ones with the cleverest copy. They are the ones where every product page follows the same structure: a clear lead, scannable bullets, and a technical section when the product warrants it. Shoppers make faster purchase decisions when they know exactly where to find the information they need, and that predictability comes from formatting discipline, not individual writing talent.
Consistent structure also reduces returns. When dimensions, materials, and compatibility are presented clearly and in the same place on every page, buyers are less likely to order the wrong thing. That is a direct profit outcome, not a nice-to-have. Mobile engagement improves for the same reason: front-loaded facts and short bullets are readable on a 375 px screen; dense paragraphs are not. The formatting work you do once, applied consistently across your catalogue, compounds over time in ways that individual page tweaks never will.
Merchup AI: bulk-generate and publish descriptions without the manual grind
Formatting every description by hand works for a handful of products. At 50 SKUs or more, it becomes the bottleneck that holds back every other improvement you want to make to your store.
Merchup AI generates SEO-optimised product descriptions at catalogue scale, enforces your chosen template structure across every SKU, and publishes directly to Shopify. There is no copy-pasting between tools, no reformatting after export, and no waiting on a copywriter. You set the template, generate a batch, run a quick editorial review, and publish.

Start with a small batch of your worst-performing product pages, compare the before and after on conversion, and then decide how far to roll it out. Try Merchup AI and see how much time your team gets back in the first week.
Useful sources and further reading
- Using the rich text editor — Shopify Help Center: official documentation for the description editor, toolbar controls, and supported formatting.
- Add HTML to a Shopify product description — Getshogun: practical guide to the HTML view, safe snippets, and common pitfalls.
- Modifying product descriptions with HTML — Ablestar Help Center: covers bulk HTML editing and basic tag reference for store managers.
- Custom product page description using HTML — Shopify Community: real-world thread on why pasting full-page HTML fails and how to fix it.
- Scoping CSS to bold text in descriptions — Shopify Community: targeted CSS fix for
strongselector overrides in product descriptions. - How to edit product descriptions on Shopify — Tevello: covers metafields for variant-specific content and structured data approaches.
- Shopify SEO checklist for AI-powered stores — Merchup AI: stepwise checklist for product page SEO, including description structure and keyword placement.
Note: Test all CSS and HTML changes on a duplicate theme or dev store before publishing to your live storefront. Shopify’s theme duplication takes under a minute and prevents any live-site disruption.


Comments
No comments yet — be the first to share what you think.